Xiamen Uni-Green Industries CO., LTD.


How To Install Uni-Green Shower Niche with Integrated Light (Illuminated Shower Niche Installation)
2024-05-31
Susie
Uni-moulding
Illuminated Shower Niche installation / LED Lighted Shower Niche installation / Backlit Shower Niche installation / Shower Niche with Built-in Lighting installation Recessed Shower Niche with Light installation / Lighted Bathroom Niche / Lighted Wall Niche for Showers installation / Shower Storage Niche with LED Lights installation Modern Shower Niche with Lighting installation / Shower Niche with Integrated Light installation
Illuminated Shower Niche installation / LED Lighted Shower Niche installation / Backlit Shower Niche installation / Shower Niche with Built-in Lighting installation
Recessed Shower Niche with Light installation / Lighted Bathroom Niche / Lighted Wall Niche for Showers installation / Shower Storage Niche with LED Lights installation
Modern Shower Niche with Lighting installation / Shower Niche with Integrated Light installation
Step 1:Connect to transformer : Connect one end of the wire to the transformer and the other end to the power switch(Seal the wire connection properly).
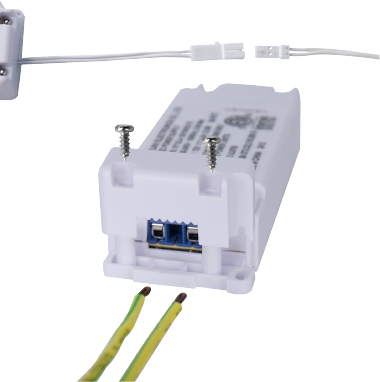
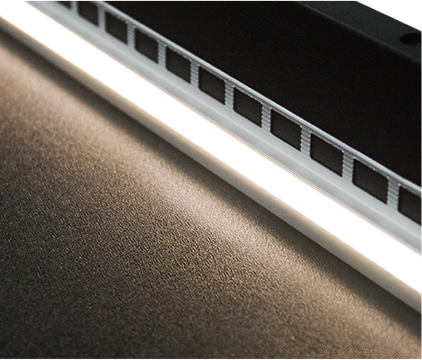
Step 2 :Test Lights Before finalizing the installation, activate the LED lights to verify proper functionality. Confirm that they emit the desired level of illumination and there are no issues with the connections.
Step 3: Location and Size : Begin by carefully deciding where you want to place your shower niche. Determine the most suitable wire length and size for your needs.
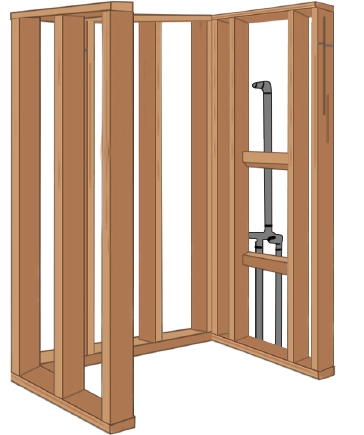
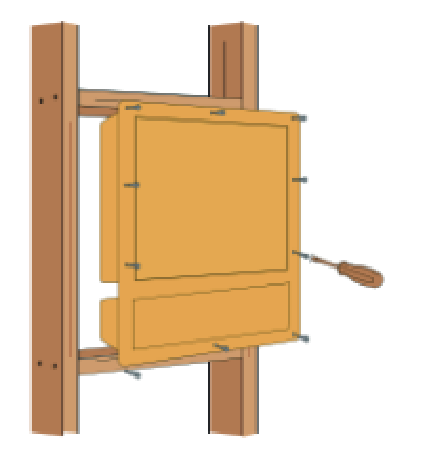
Step 4: Determine the niche frame : Determine the location of the niche between two vertical studs, and mark the 2x4 inches accordingly with the help of a spirit level. Add horizontal blocking pieces to support the top and bottom of the niche.
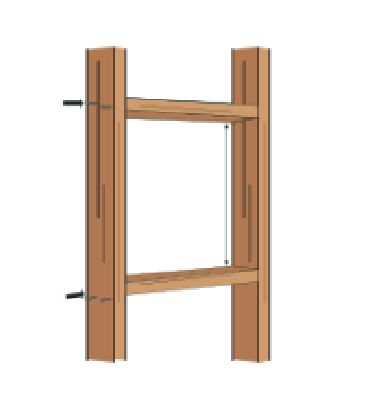
Step 5: Fix the niche to the frame : Fix the niche to the niche opening using M5*25 pan head tapping screws. Be careful not to over tighten the screw.
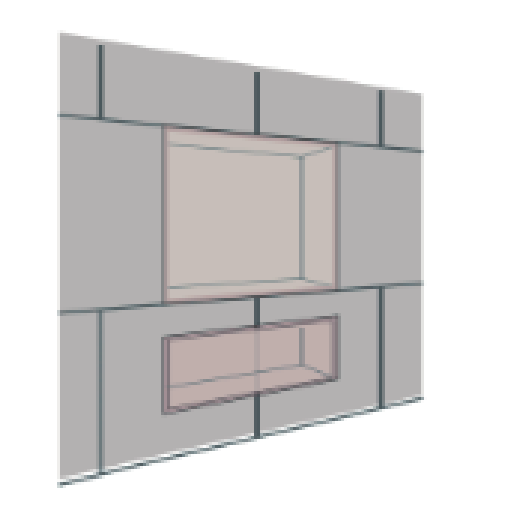
Step 6:Back plate opening : Cut an opening in the backer board to the exact size of the niche, and install it around the niche.

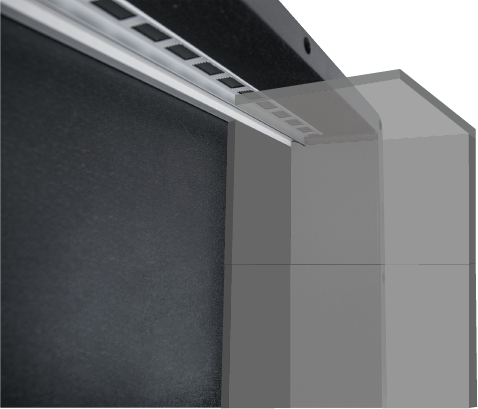
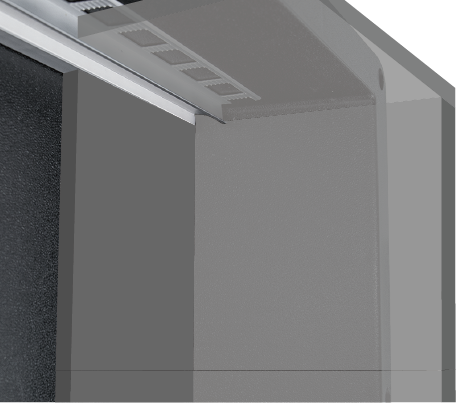
Step 7: Install a niche : Apply the thin-set to the niche and back tile with polymer modified thin-set mortar to ensure fill contact. (Attention should be paid to installing LED peripheral tiles: The top tiles need to be inserted into the aluminum frame and both sides of the tiles have support for the top tiles.)
More About The Illuminated Shower Niche
Please feel free to contact us if you have any interest or questions!
Author: Susie
Email:uni-sales03@uni-moulding.com
RELEVANT INFORMATION

Our New Catalog for Bathtub Overflow Waste Drain
2024-07-23

A Milestone Celebration!--Canadian Client Orders 10,000 Bathtub Drain Sets
2024-06-28

Superior Quality, Decorative Wall, Safe and Durable - Unveiling Our Stainless Steel Niche
2024-06-14